alright so I’m going to attempt to give credit to all the places where I got my ideas for C’s 2nd birthday…
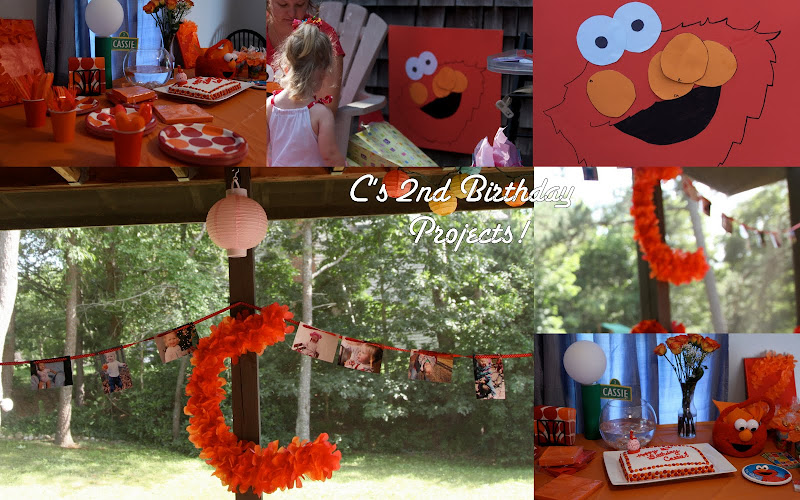
Some of the final products didn’t get great close up pics, unfortunately. But hey, party day goes quickly! Can’t think of everything 🙂
A couple of things I don’t have links for… I’ll start with those!
Pin the Nose on the Elmo
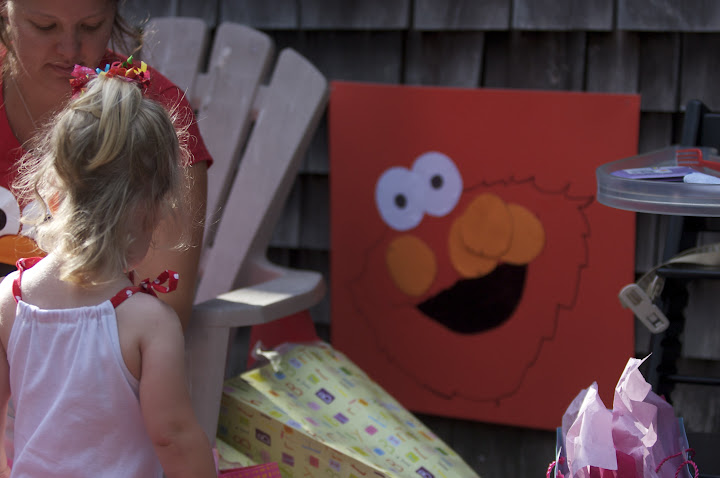
Pin the Nose on the Elmo!
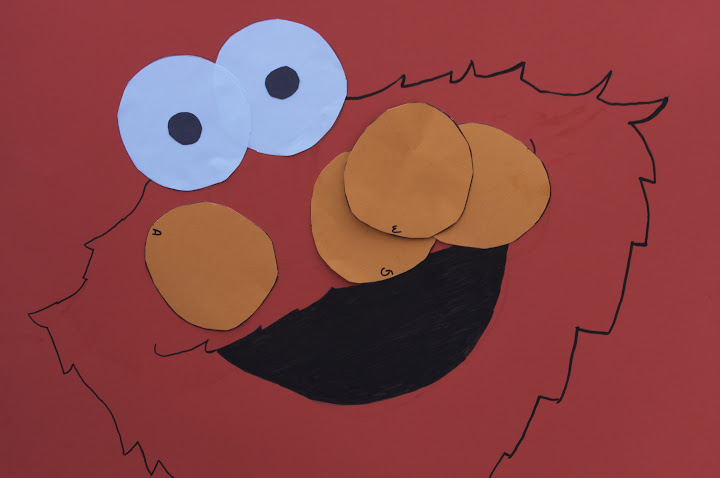 While this probably isn’t original, I came up with it on my own, as far as I can remember. My awesome husband actually executed this one for me! We googled an image of elmo (there’s about eleventy billion on google images) and he picked one to look at while he drew. He drew the face on a piece of poster board, first in pencil, then permanent marker. We used computer paper + construction paper for the eyes, and of course, left the nose blank. He then made a “template nose” using a cup/eyeballing it. He cut out enough noses for kids in attendance. I stuck double sided tape to the backs of the noses, and labeled each one with the kid’s initals so we’d know whose nose was the closest. No blindfolds are needed when doing this with the 2 and under crowd. Some kids wanted to pull noses off, rather than leave put them on. It’s all in fun! I LOVE how this came out!
Sesame Street Lamppost
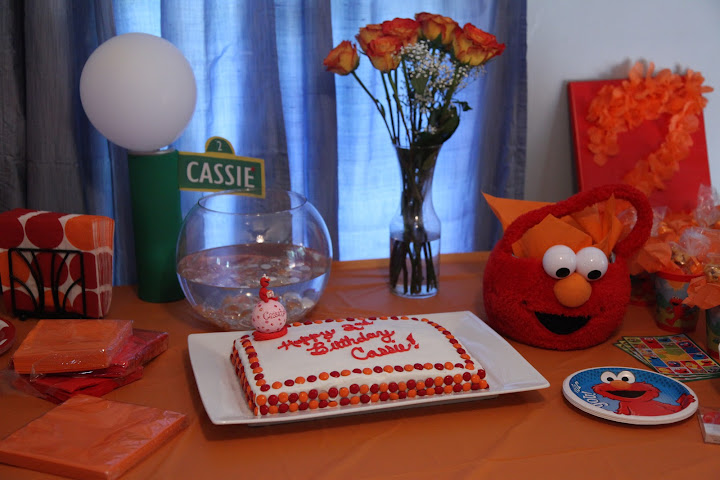
Sesame Street Lamppost
The sesame street Lamppost was made from a pringles can. I covered it with a sheet of green foam & hot glued. I used double sided tape to secure a white balloon to the top for the “light”. The sign part I somewhat cheated- I blew up the wording from her invitation to make her name. (I was running out of time!) you could easily print letters and cut & glue them though. I looked at a picture & drew/cut out the sign shape out of construction paper. Then I just used a lot of tape to stick the sign to the pringles can. Cheap and EASY! ((A theme you will notice with my crafts!)) This one I stole from a friend, but I don’t think she blogged about it, so no link.
Tissue Paper Letter/Number on Canvas
Inspired by this post at hostessblog.com, written by prudent baby. This is one that I don’t have great pictures of. C’est la vie! They are in the background of this pic:

Here’s a better picture, but with a crummy camera 🙂
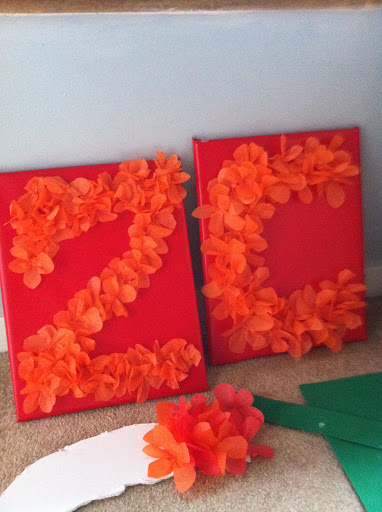
She uses fabric, I used wrapping paper (it was in the same aisle as the tissue paper and I was feeling lazy. 🙂 The good thing about using wrapping paper was that it was easy to remove from the canvas. The canvas looks brand new again post party and I already have another project pinned to use them! Yay for little waste!!
Her tutorial links to a how to make tissue flowers for a really cute garland. However, I must be slow but I couldn’t figure out how to make them her awesome way. So I just drew a flower on a stack of squares & cut out a flower shape.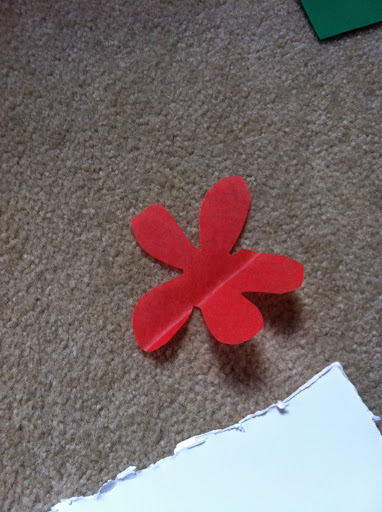 I also didn’t write my letter/number on the paper, I just eyeballed it. (I know, I know…I’m lucky this didn’t go horribly wrong!). My 2 actually looked like a “Z” for a bit, but I just kept adding flowers to round it out. 🙂
I also didn’t fold my flowers in the neat way she did. I just hot glued & smushed. 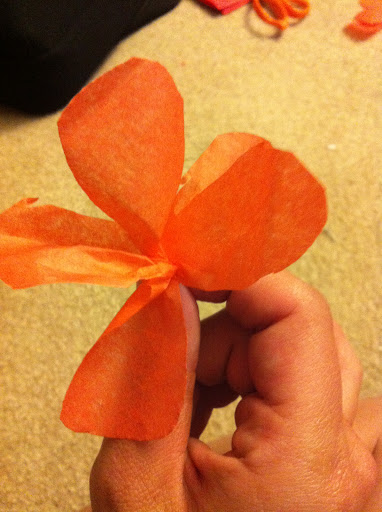
This led to some burned fingers (when does hot glue NOT lead to burned fingers…?) but I liked how quickly it went, so I suffered. 🙂
When I bought my canvas I didn’t realize it came with two in a pack, so when i discovered that, i went ahead and made a letter “c” to go with the “2”. I’m happy I did, they bookended my table nicely.
Tissue Paper Monogram Decoration/Photo Garland
This one I didn’t follow to closely, but I was inspired by this post at catch my party. Basically, if you want to make a nicer looking one than mine, I’d go to those links. 🙂 But mine is quicker! That’s me: quick, cheap, and easy. (wait…)
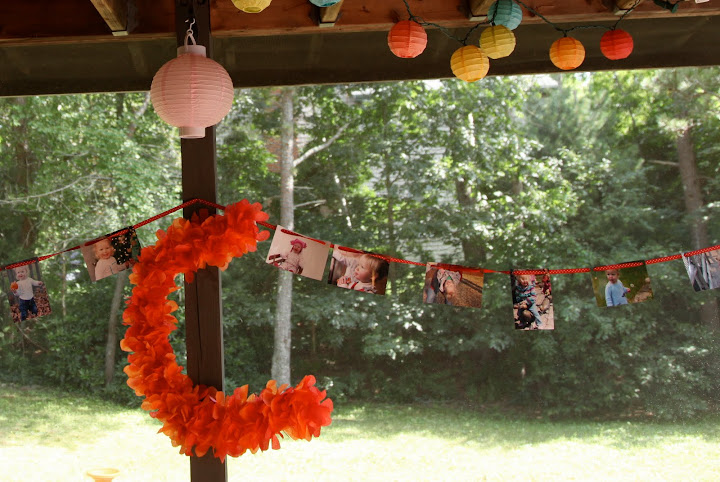
I used the left over flowers from the above tissue number/letters. I employed the same “smush & hot glue” method. I cut my “c” out of foam board with a paring knife. It was very jagged and ugly, but fortunately you can’t tell once it was covered with flowers! (I have since invested in an exacto knife).
I originally had this hanging on my front door, but when I realized my door would just be open the whole time anyway, I moved it to the porch. I think it looked really nice with my photo garland. I loved how this came out, though I wish I had a use for it post-party. Maybe next year I’ll make it in a more practical color 🙂
Taking photos of photos seemed pointless to the photographer of this house (B) so I don’t have a great picture of this. I was inspired by this post at i should be folding laundry (love her blog name!) Easy Peasy this one was. Again my awesome hubby actually did a lot of the leg work for me- picked the photos, picked them up from walgreens, and hole punched for me. What a guy. 🙂 I strung them with ribbon (which I had to tape together a few times, oops!) and hung them up. Last year I had photos of her framed over the year, but this was even easier, and I think it looked great!
Dorothy Centerpiece/ & The CAKE.
Finally, there was this centerpiece inspired by this post. A quick poll of my friends decided that living favors weren’t a good idea, so I made Dorothy be my centerpiece. C LOVED this, and was probably one of her favorite parts of the party (after cake). Sadly, Dorothy didn’t make it, but I’m thinking we may invest in a real fish tank and some goldfish soon, since it was such a hit!
My friend ended up decorating the cake for me because I got cold feet this year. We used M&Ms. Easy! The cake topper is from this etsy shop. I love it because now it can sit in her room as a keepsake from her 2nd Birthday!
Phew! that’s it. I think. If not, it doesn’t matter because my kid has watched WAY too much TV this morning in my desperate efforts to finally roll this post out. 🙂